Open your tiny bathroom vanity and you’ll usually find the same disaster: a jumble of half-empty bottles, stray cotton rounds, and a cleaning spray wedged against the drain pipe. Between the drain, the P-trap, and the shut-off valves, a small cabinet can lose a third of its usable space — which is exactly why bottles keep toppling and supplies keep disappearing. If you’re searching for under sink bathroom storage that actually works in a cramped vanity, the secret is simple: stop fighting the plumbing and plan around it. These 17 specific, renter-friendly ideas — pipe-aware bins, tiered trays, door organizers, and a grab-and-go caddy system — turn the black-hole cabinet under your sink into the hardest-working zone in your bathroom.
Measure Around the Pipes: The Layout Decides Everything
Most under-sink storage fails before it starts. A bin that looked perfect on the store shelf doesn’t fit because the drain pipe juts two inches further forward than you guessed. Five minutes of measuring removes all the guesswork.
1. Measure the cabinet interior and the pipes separately. Record the interior width, depth, and height, then the drain pipe’s diameter, how far the P-trap juts forward from the back wall, and the trap’s lowest point from the cabinet floor. A phone note with these six numbers prevents nearly every bad purchase.
2. Sketch a paper template and bring it shopping. Cut a paper grocery bag to your cabinet’s interior footprint, lay it on the kitchen floor, and mark where the pipes land. Hold every candidate bin against the template. If a bin overlaps a pipe mark or sits crooked, it goes back on the shelf.
Tiered Trays and Turntables: Using Vertical Space Around Plumbing
The pipes eat the middle of your cabinet, so the winning move is vertical: build upward in the side spaces the pipes leave open. This is where tiered organizers earn their keep.
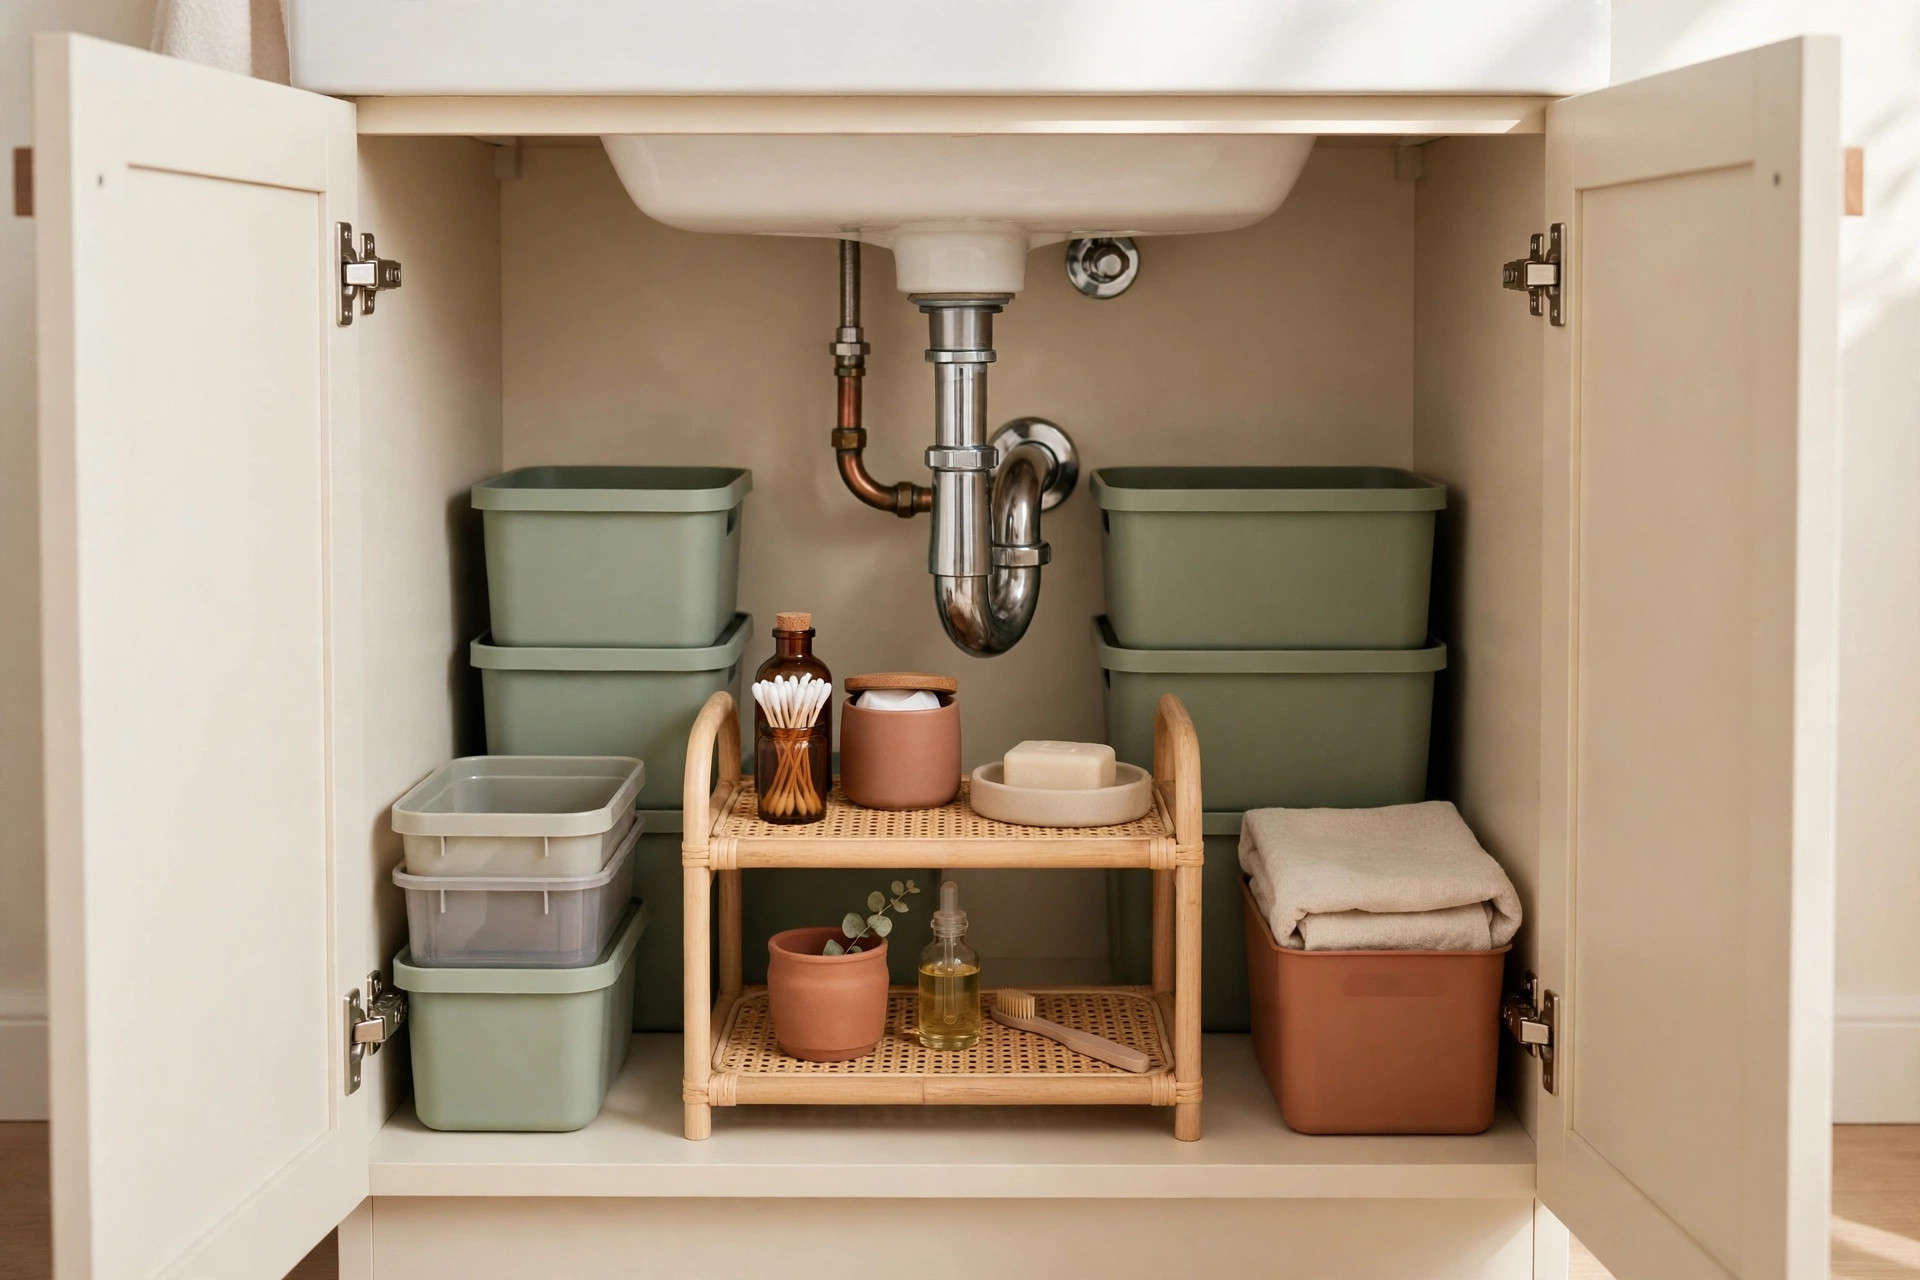
3. Put a two-tier shelf on the tallest side of the cabinet. Most vanity cabinets have a usable zone beside the P-trap that runs 12–16 inches tall — a small two-tier metal or plastic shelf fits there and doubles the storage on that side. Reserve the top tier for items you reach for daily and the bottom tier for backups.
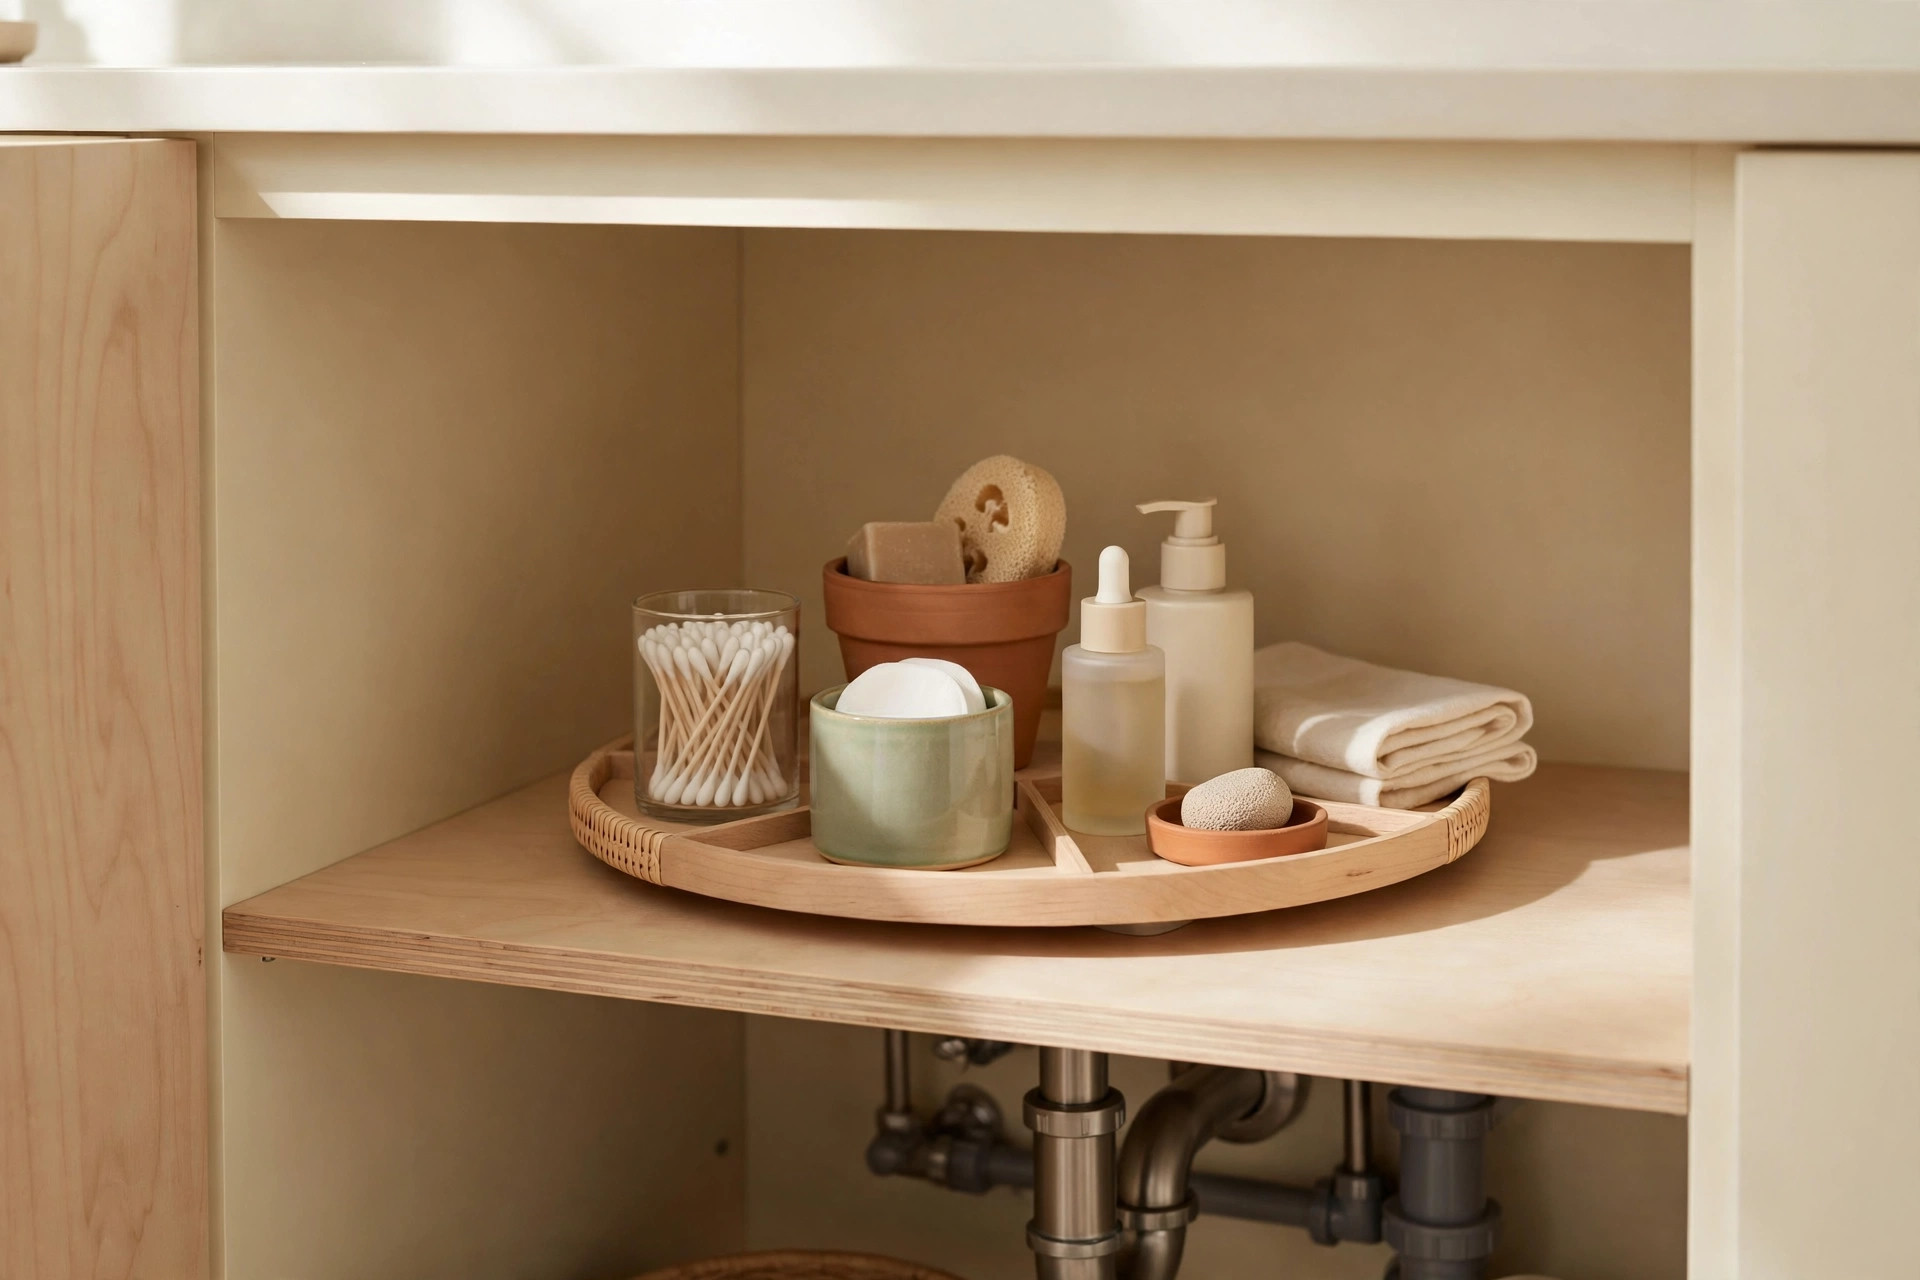
4. Use a small turntable for tall bottles. An 8- or 10-inch lazy Susan in one corner solves the classic problem of the shampoo bottle hidden behind four other bottles. Everything spins into reach, so you stop buying duplicates of products you already own. Pick one with a raised lip so tall bottles don’t fly off when you spin it. For the full vertical playbook on tiny cabinets, our under-sink kitchen organization ideas use the same pipe-aware method — the plumbing logic is identical.
5. Hang a wire shelf from the cabinet’s upper frame. If your cabinet floor is crowded with the trap and shut-off valves, a small hanging basket that hooks over the cabinet’s top frame (no screws, no drilling — renter-safe) creates a whole new storage layer for light items like cotton pads, bandages, and contact lens supplies.
Stackable Bins Sized to the Cabinet, Not the Store Shelf
Loose bottles fall over, leak, and vanish behind the pipes. Bins fix that — but only if they’re sized to your cabinet, not to whatever the store stocks.
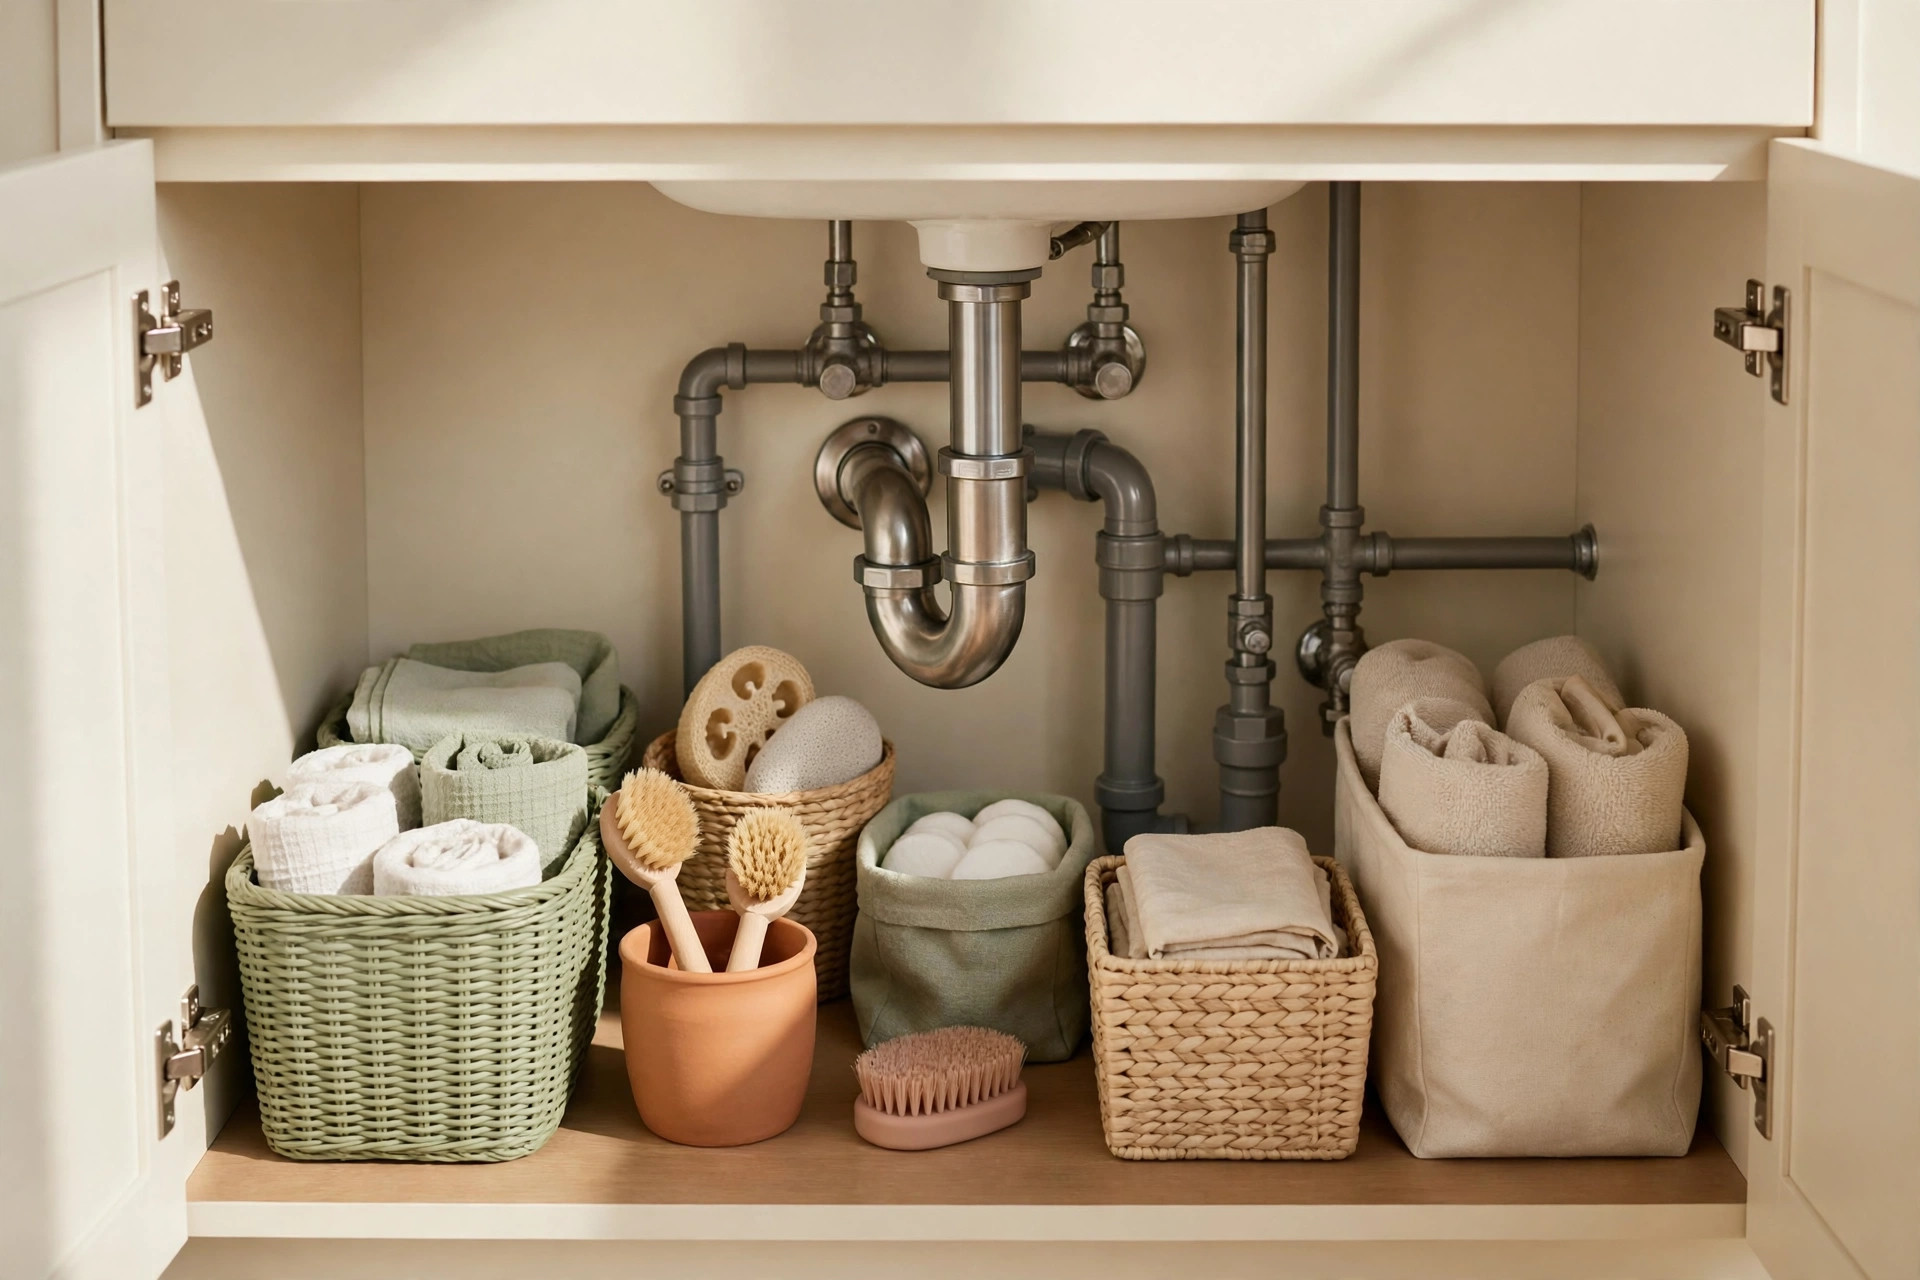
6. Choose narrow, deep bins that fit beside the pipes. In most tiny vanities, the winning bin size is roughly 6 inches wide, 10–12 inches deep, and 6–8 inches tall. Two of these slide side by side beside the drain pipe where a single wide bin would get stuck. Clear bins are best here because you can see supplies without pulling them out; label the front with a piece of painter’s tape if several people share the cabinet.
7. Stack bins in twos, not threes. Two shallow bins stacked give you easy access to both levels. A third bin on top turns the stack into a wobbly tower you have to dismantle every morning — in practice, the top bin becomes a junk drawer. Keep each bin’s contents to one category (hair products, first aid, nail care) so grabbing the right one is instant.
8. Reserve one small bin as the “daily zone” and nothing else. Put today’s essentials — deodorant, contact case, prescription you’ll take this morning — in a single open-top bin right at the front of the cabinet. Everything else lives in the organized bins behind and beside it. This is the same daily-zone principle we use for tiny bathroom counters overall, and it’s why our tiny bathroom organization ideas start with the morning routine, not the cabinet. When the daily bin starts overflowing, that’s your signal the monthly reset (idea 17) is overdue.
Door Organizers for the Products You Grab Daily
The inside of the cabinet door is the flattest, driest, most underused surface in your bathroom. It’s the perfect home for the products you reach for every single day.
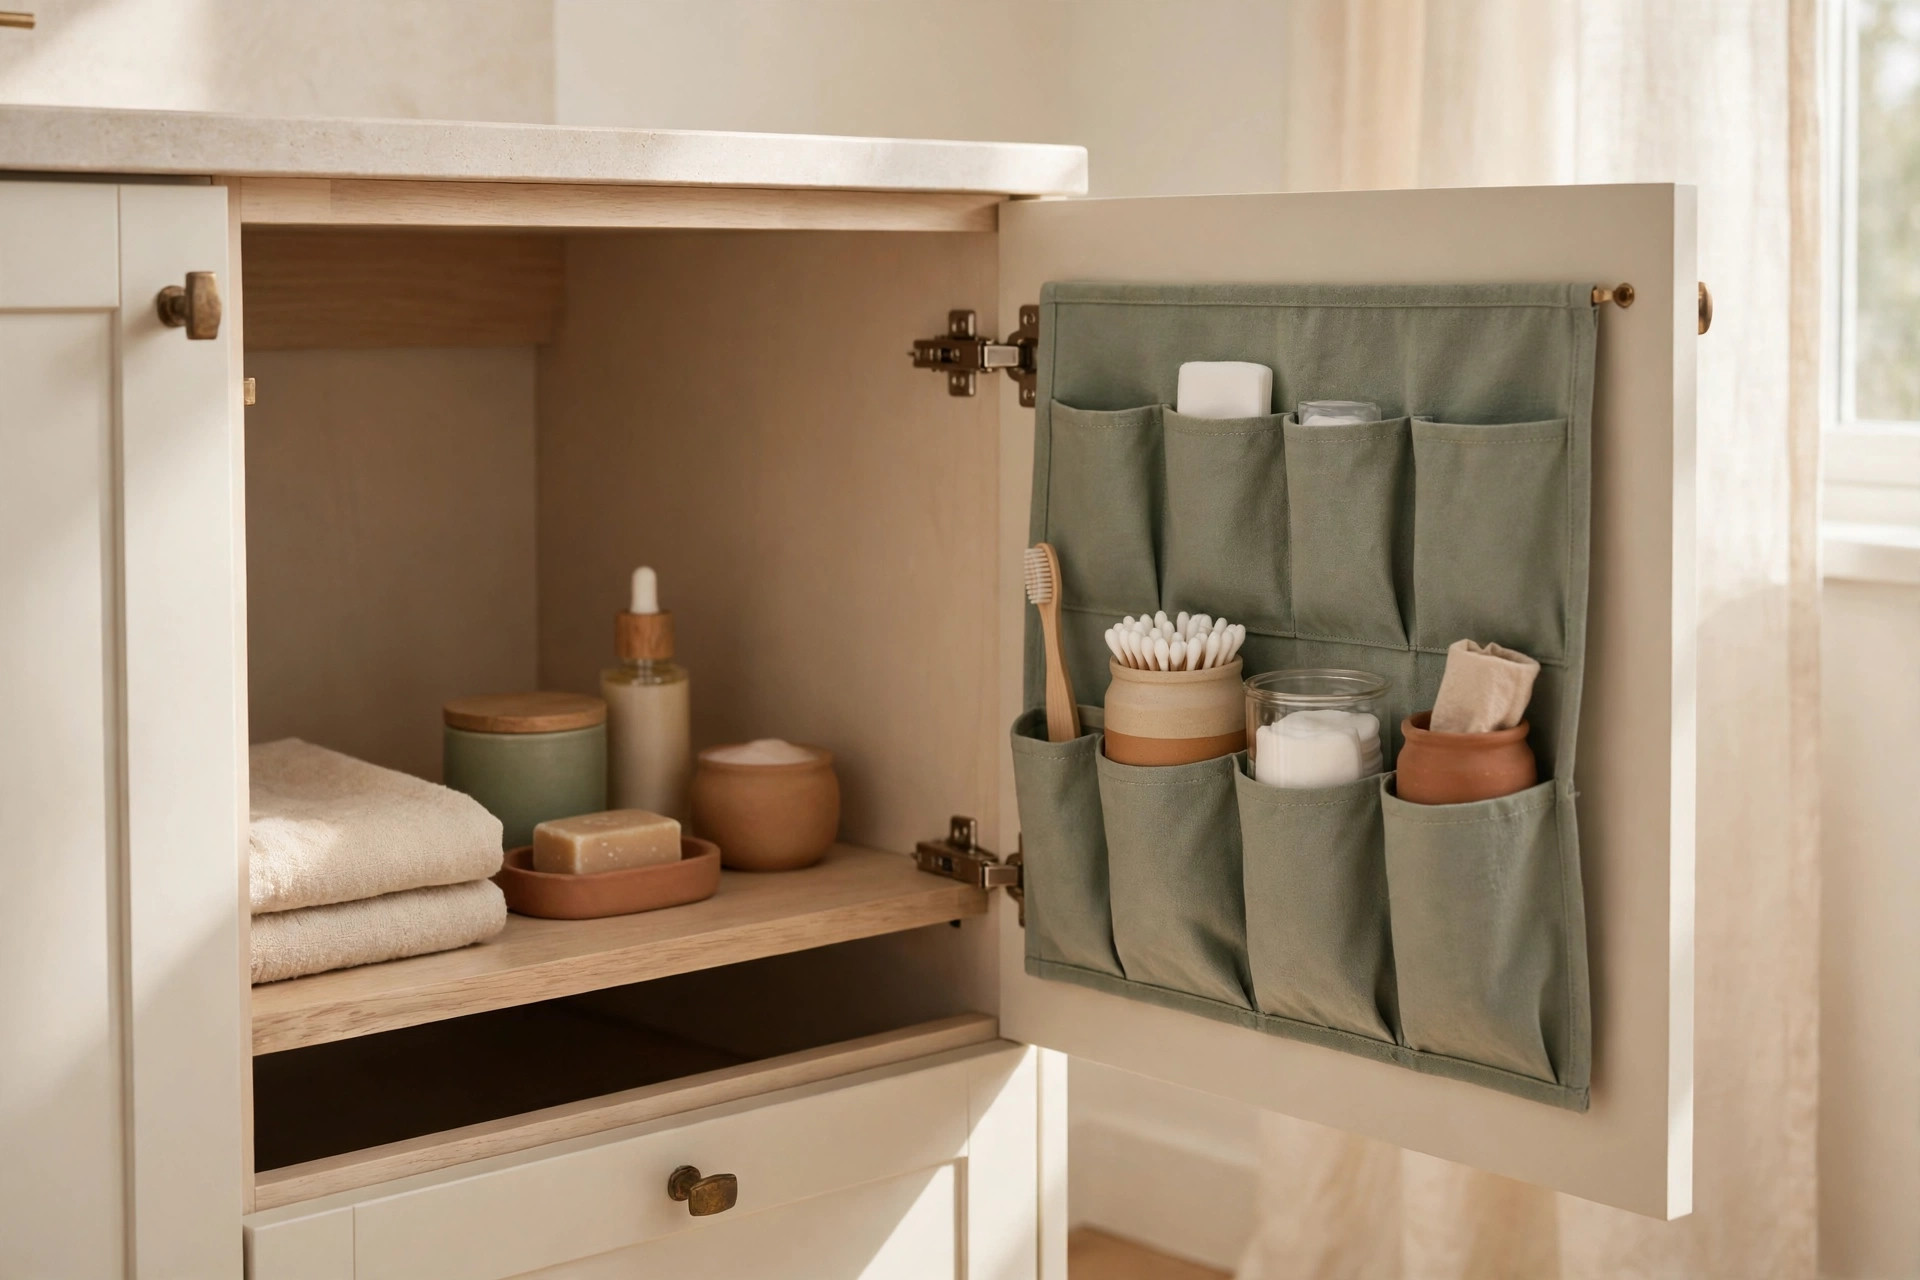
9. Add an over-the-cabinet-door rack with no drilling. Most vanity doors accept a slim over-door wire rack or a set of adhesive-backed slim caddies — no screws, no damage, fully renter-friendly. Load it with hair products, a hairbrush, or styling tools. Keep total weight light (under 3 pounds) so the door closes smoothly and the hinges don’t strain. If you’re already a fan of door storage, our over-the-door organization ideas cover taller racks for closets and entryways.
10. Stick a magnetic strip or a few small adhesive hooks inside the door for metal tools. A $5 magnetic strip holds nail clippers, tweezers, bobby pins, and the little scissors every bathroom somehow loses. Three or four tiny adhesive hooks take hair ties, a small pouch, or your contact lens case. These micro-additions reclaim space from the drawer you were about to clutter and keep metal tools from rusting in a damp bin. Just test the adhesive in one corner first — cheap strips peel paint if they fail.
The Caddy Method: One Grab-and-Go Kit Per Person
When two or more people share a tiny bathroom, the under-sink cabinet becomes a battleground. The caddy method ends the war: each person gets one portable kit with their own daily products, and the cabinet just stores the kits.
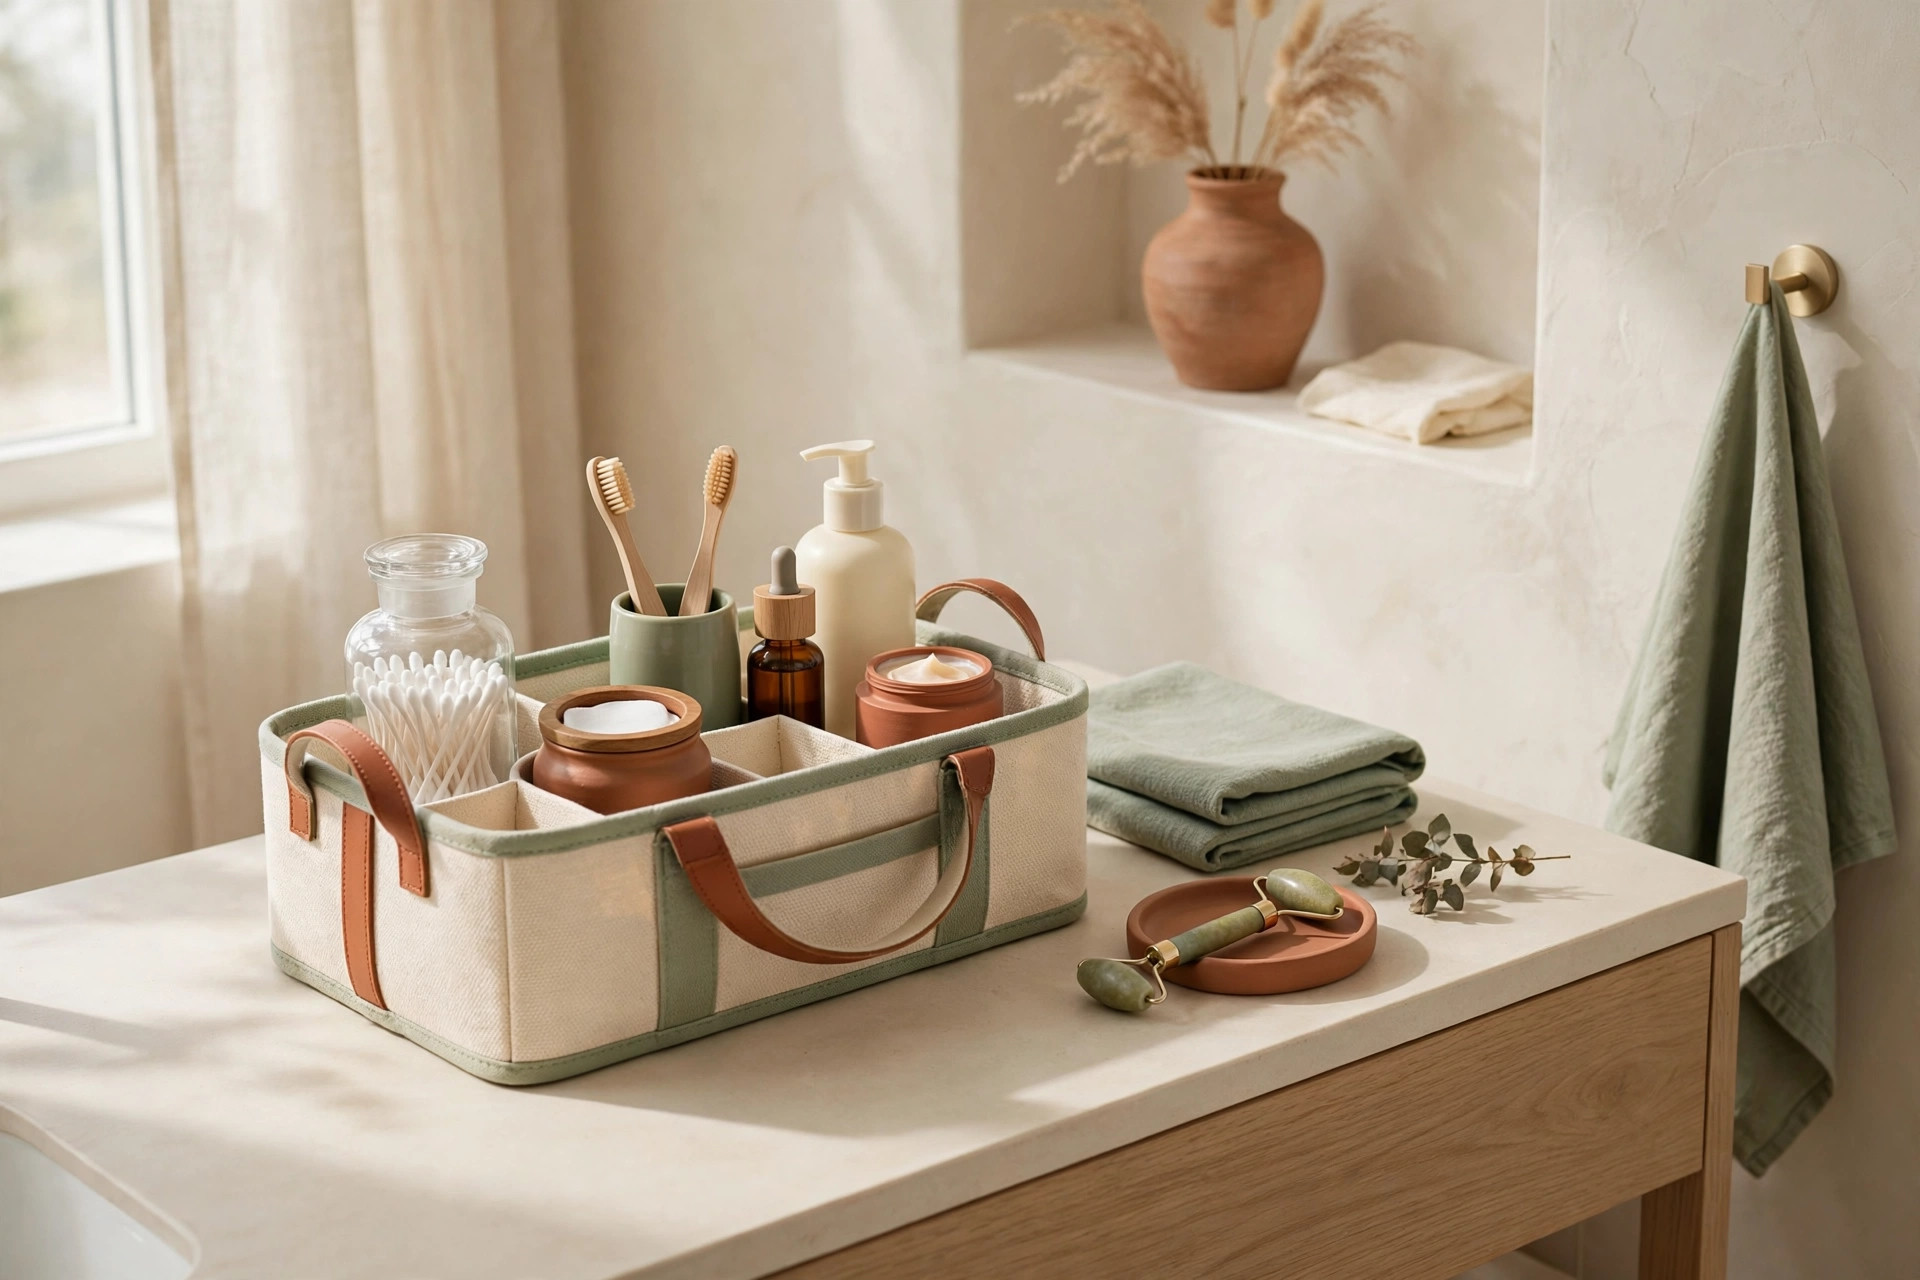
11. Give each person a handled caddy sized for their routine. A caddy around 10 inches long, 6 inches wide, and 6 inches tall holds one person’s full routine — face wash, toothbrush, razor, deodorant, a couple of products — and nothing more. The handle matters: it’s what makes the kit grab-and-go instead of another box to dig through.
12. Store the caddies upright, handles out. Line the caddies along the front of the cabinet with handles facing you so each person grabs theirs without disturbing the other’s. Anything that doesn’t fit in a caddy (bulk toilet paper, cleaning supplies) goes in the pipe-zone bins behind them. If products spill, you lift out one caddy and rinse it — no unloading the whole cabinet.
13. Keep a single “shared supplies” bin behind the caddies. Toothpaste, soap refills, cotton rounds — the household staples everyone uses — live in one communal bin at the back of the cabinet. This keeps shared items from duplicating inside every personal caddy and makes it obvious at a glance when something is running low.
Decanting Bulky Bottles: What Helps, What Wastes Money
Those oversized Costco shampoo bottles are the reason your cabinet overflowed. Decanting — moving product into smaller, uniform containers — saves serious space, but only for the right products.
14. Decant only the bulky products you buy in bulk. Family-size shampoo, conditioner, and body wash are the classic candidates: pouring them into slim, uniform 12-ounce bottles frees up 3–4 inches of height per bottle and lets three bottles sit where two used to. Use a small funnel, label each bottle immediately (shampoo and conditioner look identical in clear bottles), and keep the original bulk bottle for its expiry date and ingredient list.
15. Don’t decant anything with a short shelf life or an applicator you can’t replicate. Sunscreen, anything with an active ingredient (retinoids, vitamin C serums), and products with special pumps or precision tips lose effectiveness or usability when decanted — the air exposure and non-airtight containers degrade them faster. Keep those in their original packaging and give them the prime real estate on the turntable or top tier instead. Decanting is a space tool, not a universal rule.
What NOT to Store Under a Bathroom Sink
The cabinet feels like free storage, but heat, humidity, and the occasional slow leak make it hostile territory for several categories. Moving these four out protects both your stuff and your health.
16. Move out medications, high-end skincare, electronics, and anything flammable. Bathroom cabinets run warm and humid — conditions that degrade medications faster and can damage electronics’ battery contacts. Keep prescription meds and actives in a dry bedroom drawer instead. Cleaning chemicals can stay, but store them upright in a bin with a leak-proof tray, never mix products, and keep bleach far from ammonia-based cleaners — the fumes from an accidental mix are genuinely dangerous. If you share the cabinet with kids or pets in the house, a simple adhesive cabinet lock is the safest upgrade you can make. For guidance on keeping household products away from children, the American Association of Poison Control Centers at poison.org maintains practical, free storage-safety guidance.
The 10-Minute Monthly Vanity Reset
Organization isn’t a one-time project — it’s a habit. But the habit doesn’t have to be big. Ten minutes once a month keeps the whole system working.
17. Run the same 10-minute reset every month, no exceptions. Pull out all three bin types (daily zone, caddies, pipe-zone bins) — one category at a time, not the whole cabinet at once. Toss anything expired, nearly empty, or that you haven’t touched in two months. Wipe the cabinet floor with a damp cloth (this is also your leak check — feel the pipe connections while you’re in there). Put back only what earns its spot. Ten minutes, once a month, and the cabinet stays the organized zone you built instead of sliding back into the black hole.
Frequently asked questions
Can I organize under a bathroom sink without buying anything?
Yes. The paper-template trick (idea 2) and the zone layout work with whatever you already own — relabel a few jars, cut down a cardboard box to fit beside the pipes, and set up one daily-zone container. Most of the transformation is arrangement, not products.
How do I organize under the sink if the pipes take up the whole middle?
Treat the pipes as fixed walls and organize the two side pockets beside them plus the door zone. Narrow deep bins, a small turntable, and door hooks are built for exactly this layout — they work around plumbing instead of needing space the cabinet doesn’t have.
What should I put on the bottom of the cabinet to protect it from leaks?
A washable, waterproof shelf liner or a shallow plastic tray under the pipe zone catches drips before they swell the cabinet floor. Cut it to fit around the pipes and pull it out to rinse during your monthly reset.
Is it okay to store cleaning products under a bathroom sink with toiletries?
Yes, with one rule: keep them separated. Put cleaning products in their own bin on one side and toiletries in another — never loose together. Store everything upright, and skip this setup entirely if kids or pets can access the cabinet without a lock.
Conclusion
Under-sink bathroom storage for tiny vanities comes down to one decision: plan around the pipes instead of around them. Measure first, build vertical with tiered trays and turntables, size your bins to the cabinet, claim the door, and give every person a caddy. Ten minutes a month keeps it all working. For more small-bathroom ideas in the same warm, practical style, browse our small-spaces collection — and save this pin for later so your next monthly reset has the whole checklist in one place.